Meta Pixel For Fydelia
You’re not just providing WiFi — you’re converting real-world visitors into trackable, retargetable digital audiences that drive repeat revenue.
Using Meta Pixel (formerly Facebook Pixel) you capture valuable audience data from every WiFi login and use it to power highly targeted Facebook and Instagram ads.
You'll be able to track website activity and optimize your advertising performance.
Prerequisites: You must be logged into your Fydelia account and have access to your Meta Business Manager.
Five Step Enablement
Below are the five steps carried out jointly by Client and Fydelia to enable Meta Pixel.
Find Your Business ID
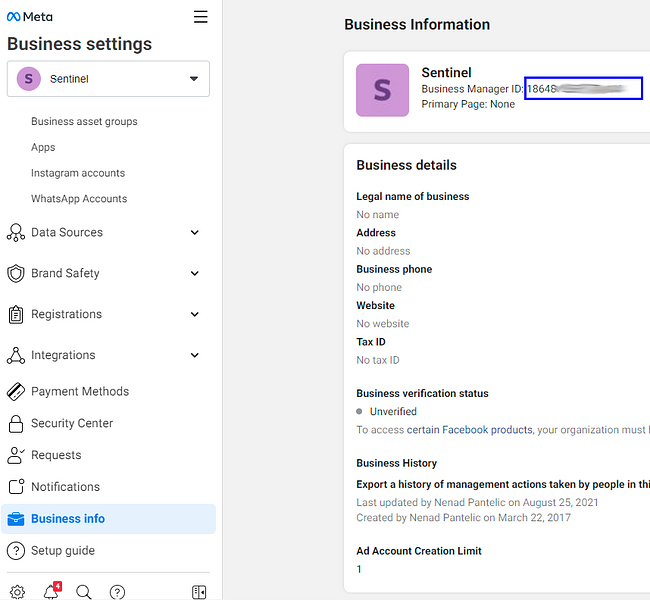
1. In Meta Business Manager go to Business Settings.
2. Click Business Info.
3. Below Business Manager Info, you'll see your ID number.
4. Copy the number and send to support@fydelia.com with the subject: FB Pixel Business ID.
We will assign your Pixel ID to all Fydelia's splash page hosting domains, enabling the direct pass-through of all Custom Events to your Meta Pixel.
Add Client To Fydelia Domains
These steps are performed by Fydelia Support.
1. Go to Sentinel's Business Manager.
2. Click Brand Safety > Domains.
3. Select a particular Domain and then click on Assign Partners.
4. A modal window will pop-up. Input Business ID of the new client and enable both settings
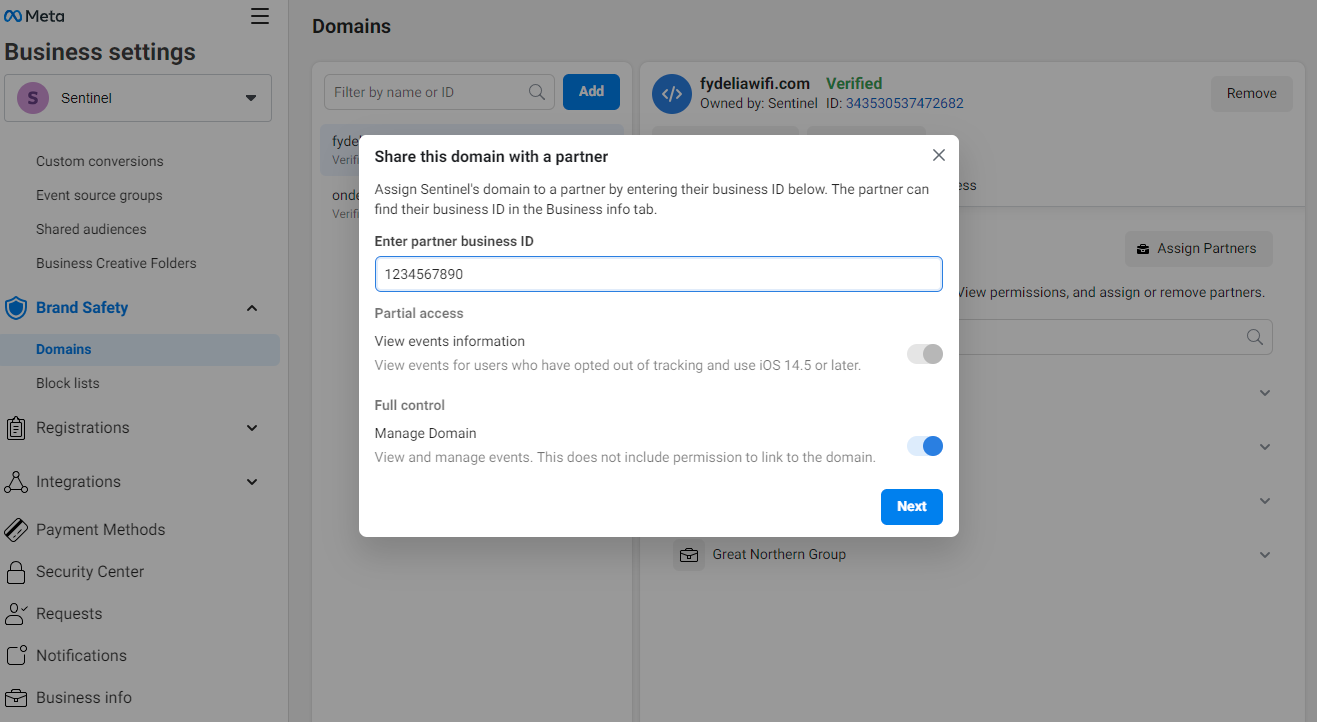
Do this for both:
1. fydeliawifi.com
2. ondemand.fydeliawifi.com
Now, Meta will allow events to pass-through from our domains to client's Mexta pixel
Getting Your Meta Pixel ID
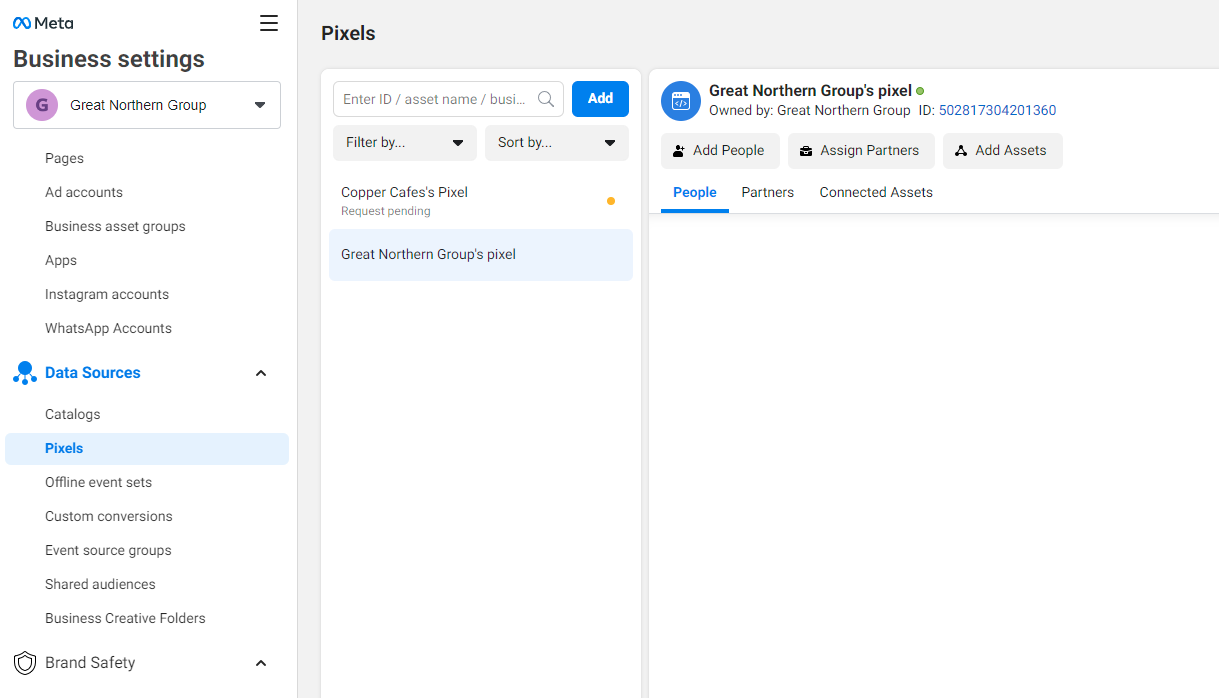
1. In Meta Business Manager go to Business Settings.
2. Click Data Sources > Pixels
3. From the list of available Pixels find the appropriate one (usually indicated with a green dot which represents an active pixel)
4. Copy the number and send to support@fydelia.com. (In the screenshot the Pixel ID is 502817304201360.)
Update Splash Page With Meta Pixel
1. Find and edit splash page. (See Finding and Editing Your Splash Page.)
2. Under Analytics Tools find the Facebook Pixel widget.
3. Drag-and-drop Facebook Pixel widget onto the splash page.
4. Hover over the widget until you see the blue Edit button in the upper lefthand corner and click it to configure the Facebook Pixel widget. Input the Facebook pixel ID.
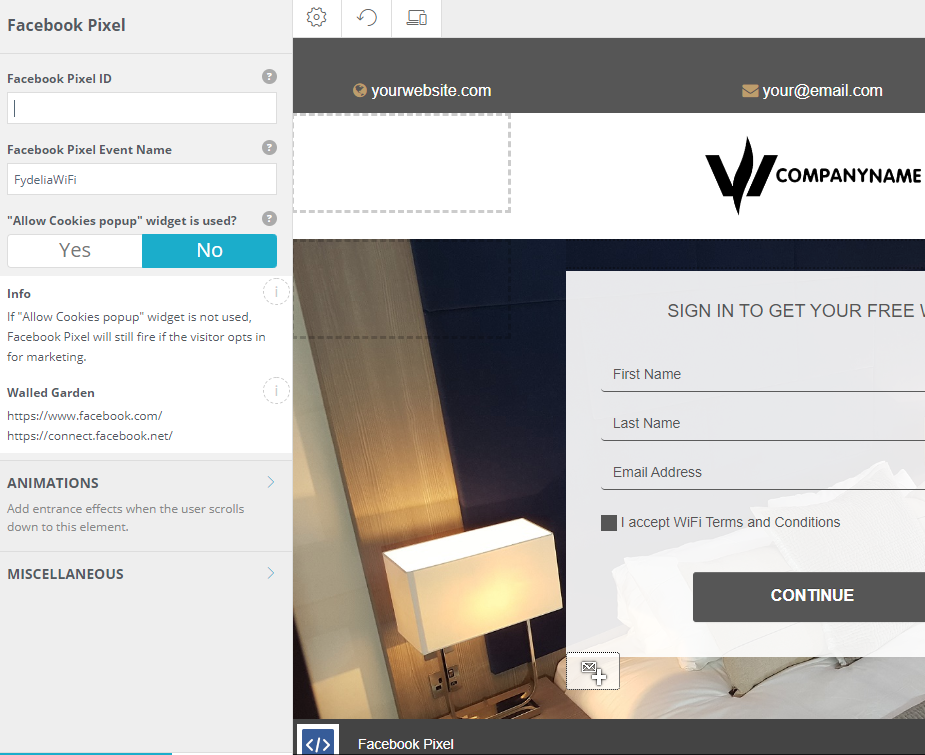
5. Repeat this for all of your splash pages.
Now, splash pages will send event (FydeliaWiFi or any other custom name) to your Facebook pixel.
Event will come from the verified domain which your Business Manager has been assigned to.
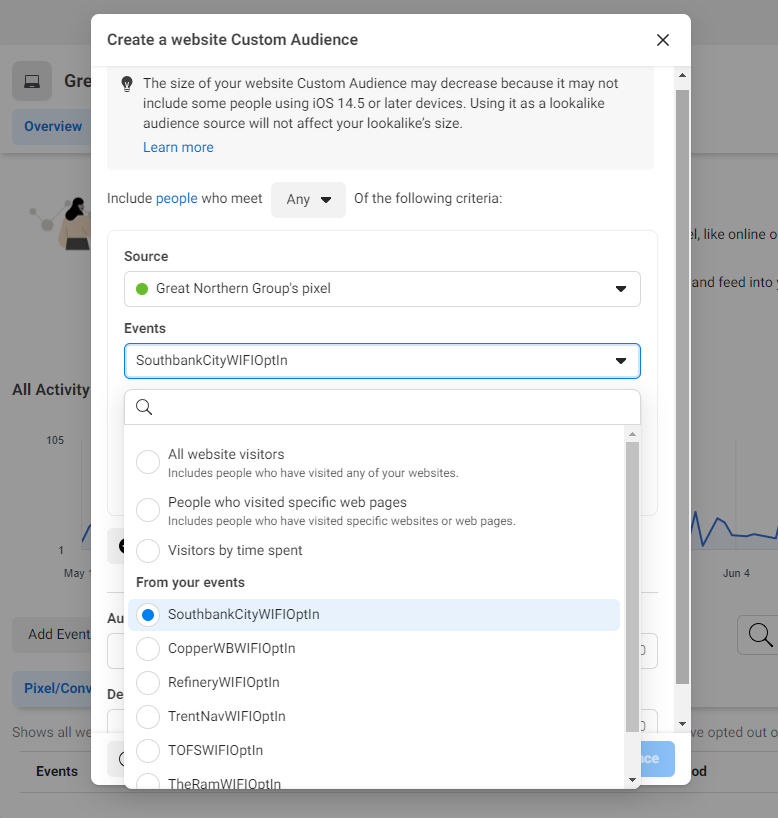
Create Your Remarketing Audiences
1. In Meta Business Manager go to Business Settings.
2. Click Data Sources > Pixels
3. Select an active pixel and then click on the Open in Events Manager in the top-right corner of a page.
4. In the Events manager click on the green Create button, and then select Create Custom Audience.
5. A new dialog will pop-up. Select the audience Source (all Pixel visitors or from a specific venue).