Ruckus Unleashed External Captive Portal setup
Ruckus Unleashed is designed for smaller deployments and is known for its simplicity. It's easier to set up and manage compared to larger-scale solutions like SmartZone. In this article we will set up an external captive portal on an existing Fydelia Guest WLAN:
Splash page portal settings
Choose Hotspot services
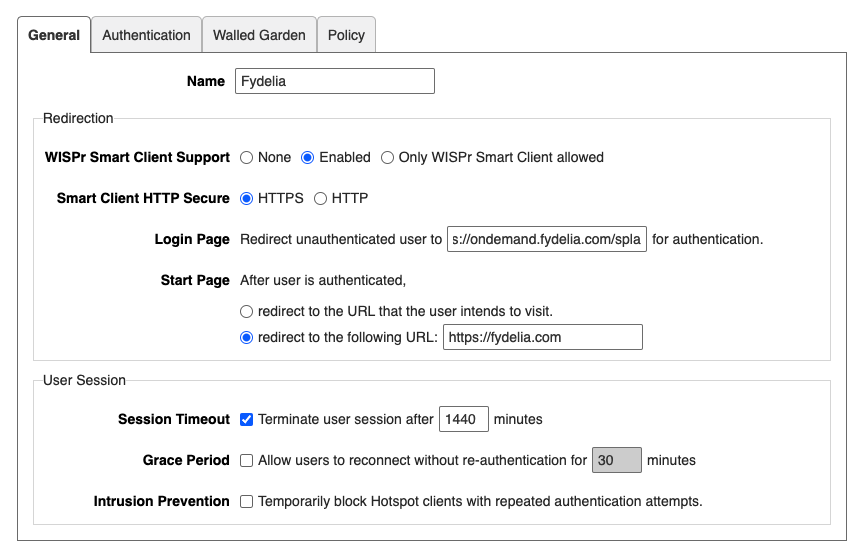
Fill in the details as follows:
- WISPr Smart Client Support: Enabled
- Smart Client HTTP Secure: HTTPS
- Login Page: Your Splash URL
- Start Page: Your desired post-login landing page
- Session timeout: Usually set to one day (1440 minues)
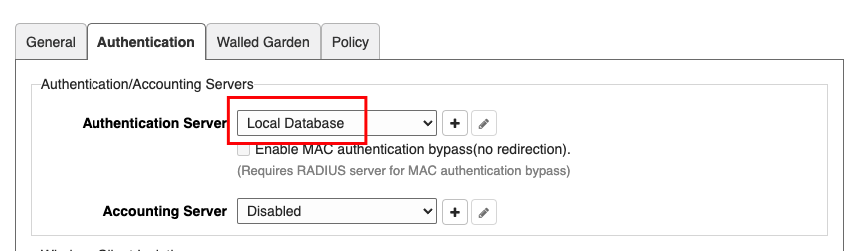
In the AUTHENTICATION tab make sure Local Database is chosen:
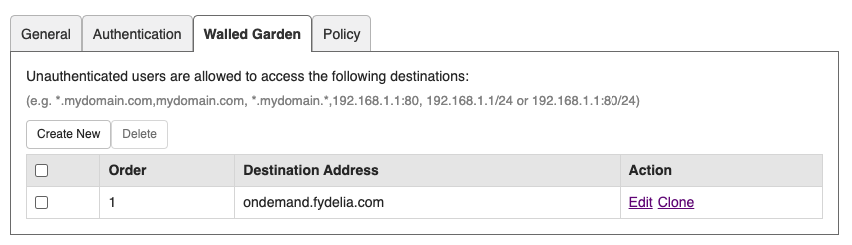
In the WALLED GARDEN tab add the splash page domain, typically "ondemand.fydelia.com":
Adding a Fydelia local user
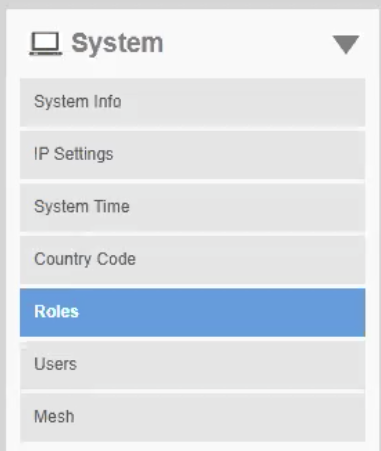
In the System area click ROLES:
Click create new and enter these details:
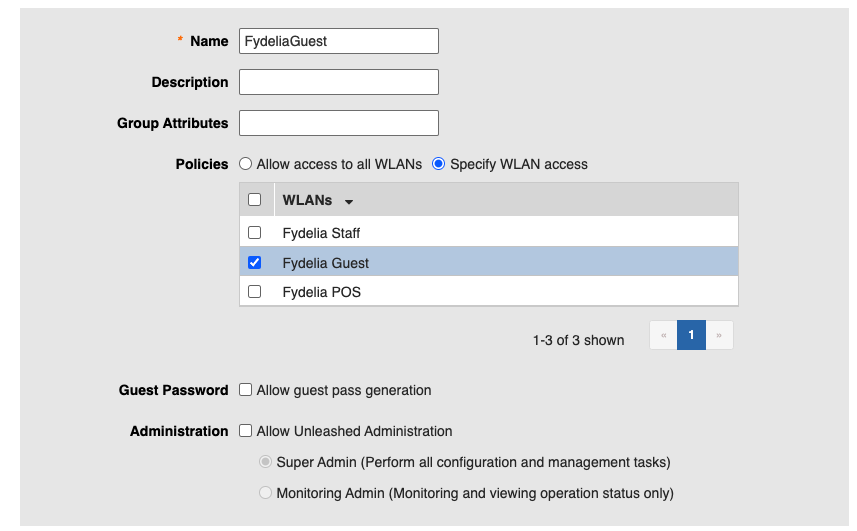
Click OK to create the role.
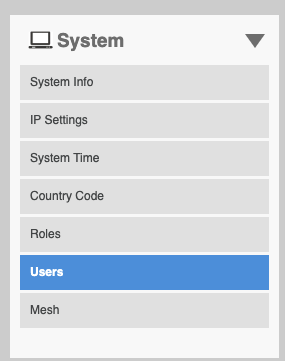
In System click Users:
Click CREATE
Enter the desired username and password that you have used on your Ruckus form settings on your splash page:
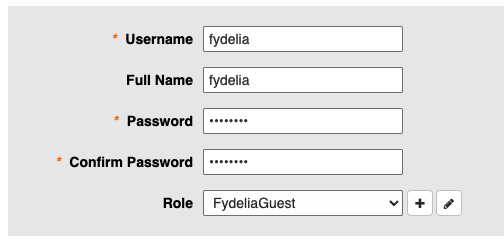
Click OK to save the user
Click OK to go back to the main dashboard
Enable the hotspot
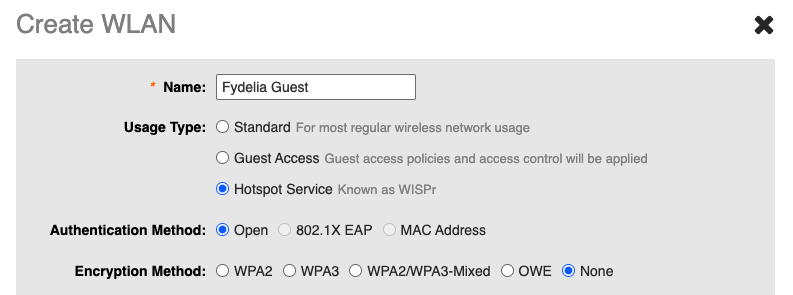
When creating your guest WLAN choose "Hotspot Service":
Choose the hotspot service you created:

Save your settings
You're all set! Guests can now authenticate via Ruckus Unleashed