
Configuring your UniFi controller to redirect guests to Fydelia splash pages
Preparation
You will need:
- A controller with the latest software version, which is one of the following:
- CloudKey with an externally accessible IP or FQDN
- Local controller with an externally accessible IP or FQDN
- Cloud-based UniFi controller
- A Fydelia account and splash page using the UniFi Entrance form
1. Creating a dedicated Admin Account for Fydelia
Fydelia requires a basic admin account on your site in order to be able to authenticate guest devices onto your network.
CLICK HERE to learn how to set up a new admin user on your controller.
Adding a new Wireless network
1. Create a new Wireless network
Choose Wireless Networks and click create:
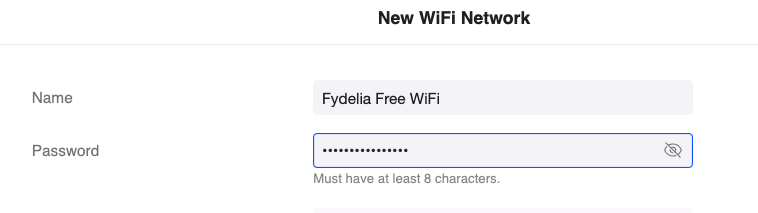
Note: You must first create a password. UniFi won’t allow you to create a new network that is open by default
2. Click ADD WIFI NETWORK
3. Click on the WiFi network to edit
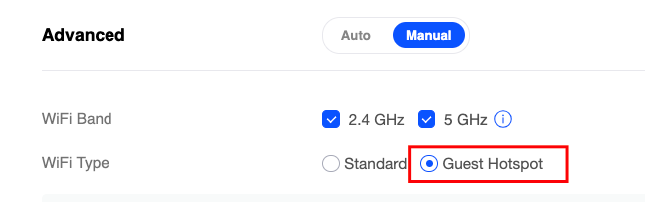
4. In ADVANCED choose Manual:

5. In the SECURITY area choose Open:

6 Under WiFi Type, enable the guest Hotspot
7. Save your settings by clicking “APPLY CHANGES”
This is required before you can proceed.
Configuring the Hotspot settings
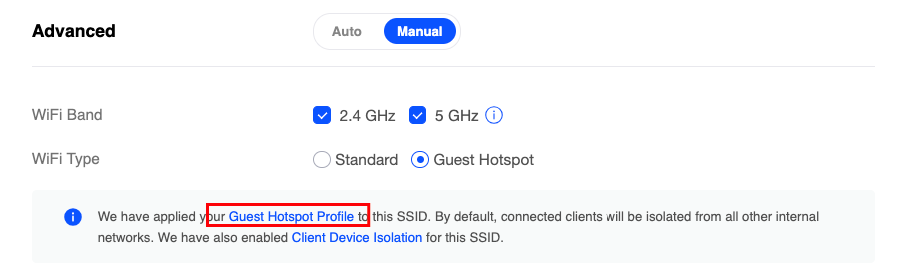
- Click on the Guest Hotspot Profile link
NOTE: On UniFiOS you’ll find this in the left menu under “Profile”
Click here to set up a UniFi OS
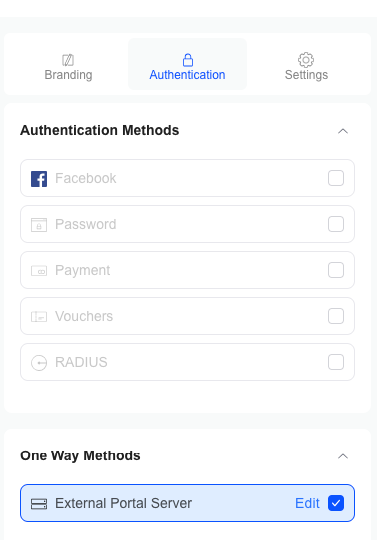
2. Click the AUTHENTICATION tab and enable External Portal Server
NOTE: UniFi requires you to enter an IP. However since we will use domain-based authentication, the IP won’t be important.
Enter: 144.76.195.139
The IP address for Fydelia is: 144.76.195.139
3. Under Landing Page settings choose the following:
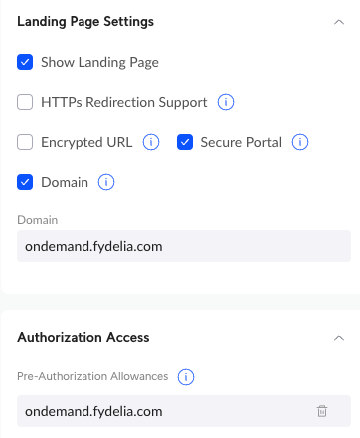
For Domain and the Pre-Auth domains, use:
ondemand.fydelia.com
4. Click SAVE
You’re all set! Any access points you now adopt to this site will automatically broadcast your SSID and redirect guests to your Fydelia splash page.